The story so far...
In the first part of this series I described the problem I was having, my hypothesis as to the source of the issue, and the steps I would take to test my hypothesis. In the second post I described the electronics that I built to start capturing environmental sensor data. The third post describes the code for the IoT sensor rig to send telemetry data to Azure IoT Hub. This post will address the configuration within Azure IoT Hub.
Blog Series Table of Contents
Part 1 - Problem Space
Part 2 - Electronics
Part 3 - ESP8266 Code
Part 4 - Azure IoT Hub <-- This post
Part 5 - Azure Stream Analytics
Part 6 - Power BI
Part 7 - Drawing Conclusions
Azure IoT Hub Configuration recap
In Part 3 of this series we Setup an Azure IoT Hub instance and added entries for our ESP8266-based sensor rigs.
Storing the telemetry
I wanted to keep the messages generated by my sensors so that I can review them or perform other activities on the dataset. To enable this I needed to tell the Azure IoT Hub to squirrel the message payloads away. For that to work I created an Azure Storage Account and configured Azure IoT Hub to store incoming messages there.
Setup a Storage Account
We are going to store the messages in blob storage so we need to setup a Storage Account. Use the steps in Create a storage account with the following settings per step.
- Login to Azure with the credentials you used to create the IoT Hub.
- n/a
- Follow the naming rules listed in the article.
- Use the Resource Manager (default) deployment model. The Classic is so 2015.
- Select General purpose storage account type.
- For my purposes, I used LRS (Locally-redundant storage) for this project. If this data is more important than mine, I'd advise going with a GRS replication option.
- Use the same subscription that you used when creating the IoT Hub.
- I used the same Resource Group that holds my IoT Hub so that everything is easy to find.
- I place the Storage Account in the same Region as my IoT Hub so that there is less latency.
- Yeah...do this.
Add the endpoint to your IoT Hub
-
Open the Azure Portal and navigate to your IoT Hub.
-
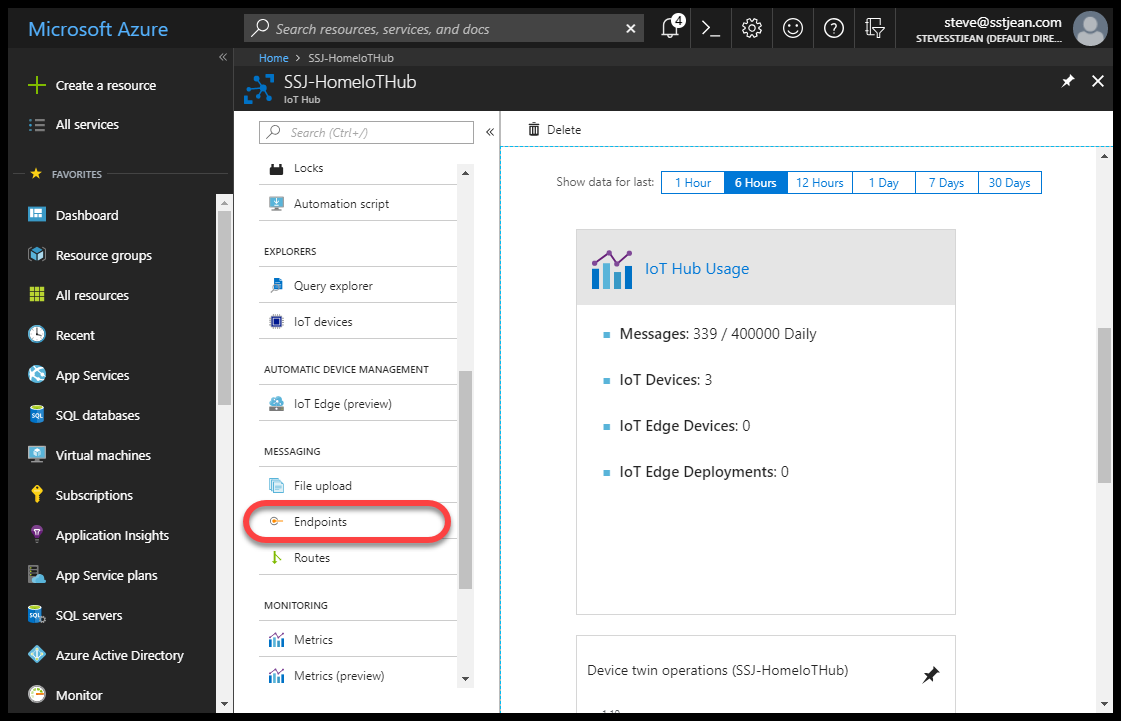
Scroll down to the Messaging section and click on Endpoints
-
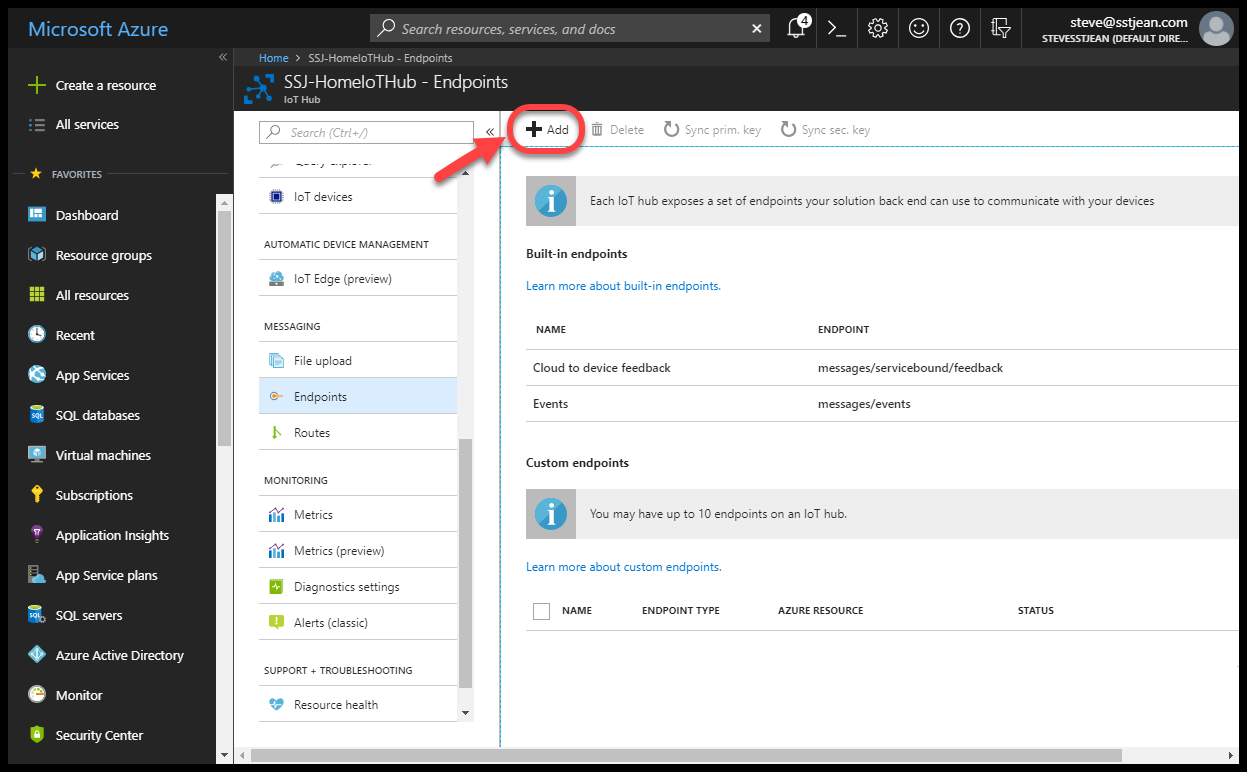
In the Endpoints page click on the + Add button to create a new endpoint.
-
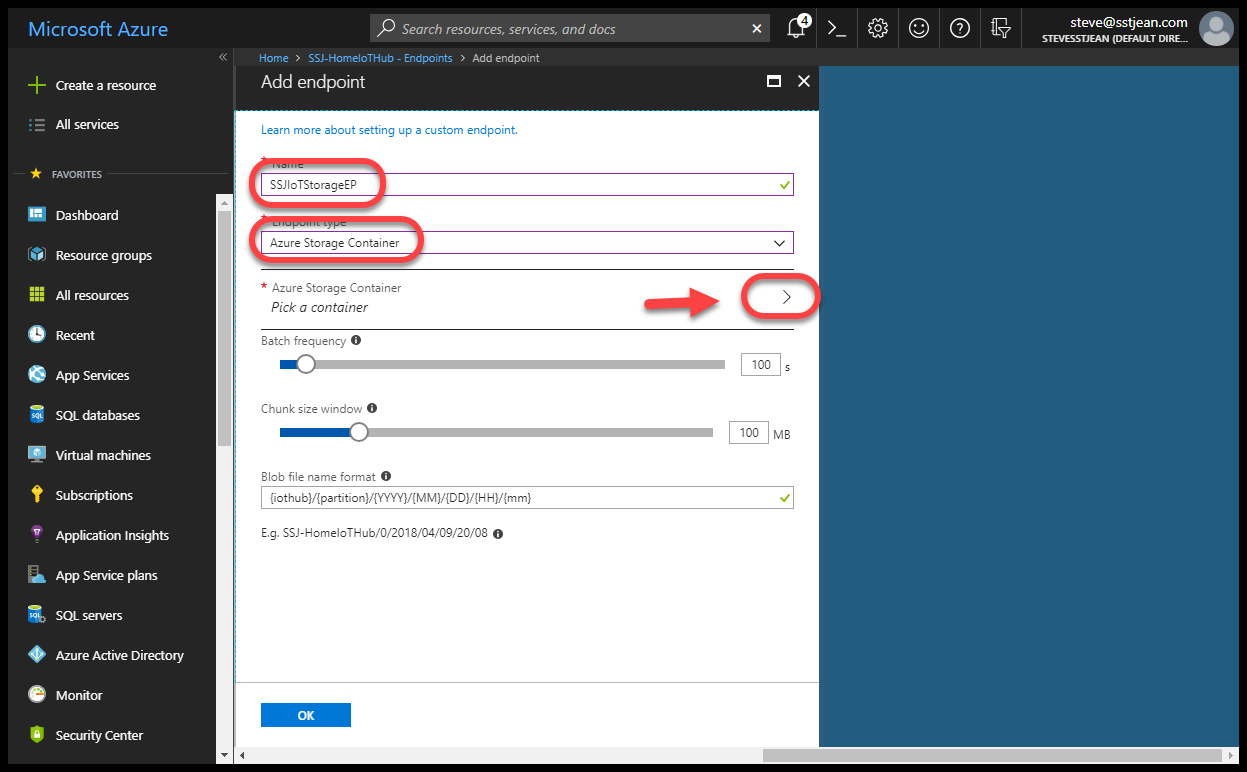
In the Add endpoint blade enter a name for the endpoint and select Azure Storage Container for the Endpoint type. This will show an extended set of inputs. Click on the Pick a container arrow.
-
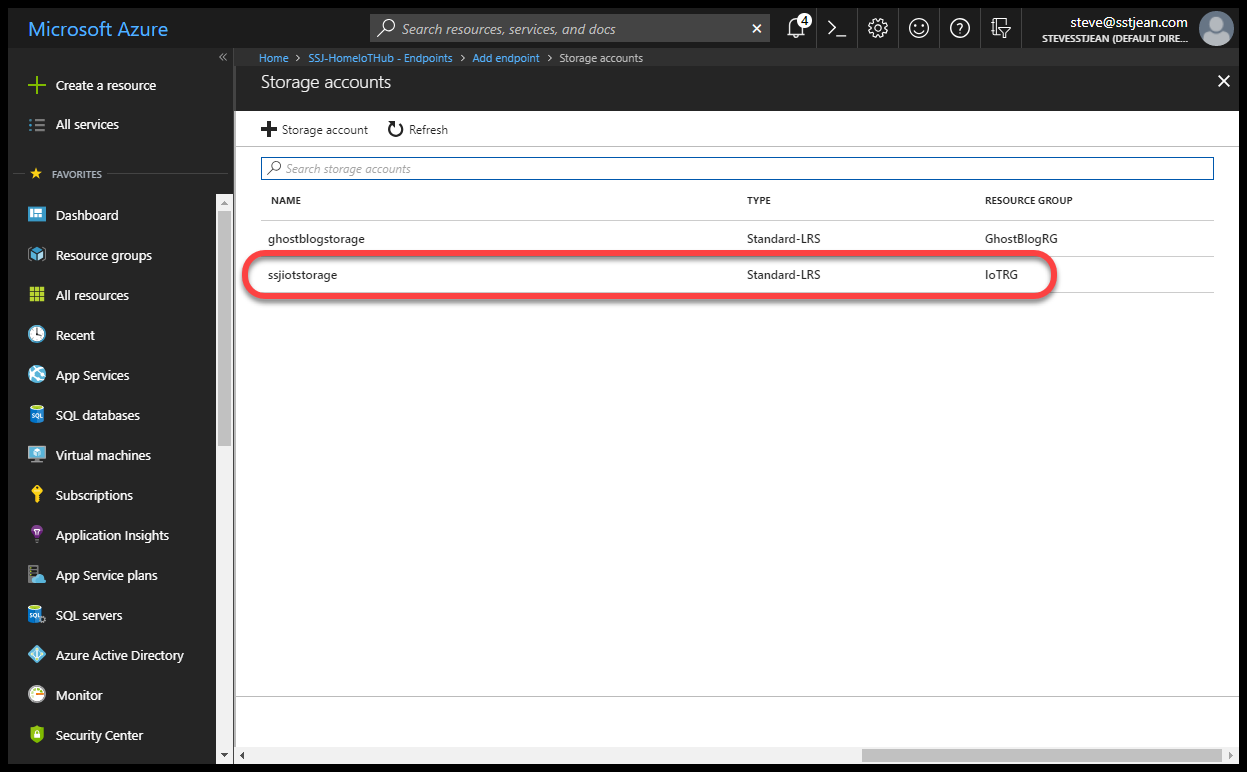
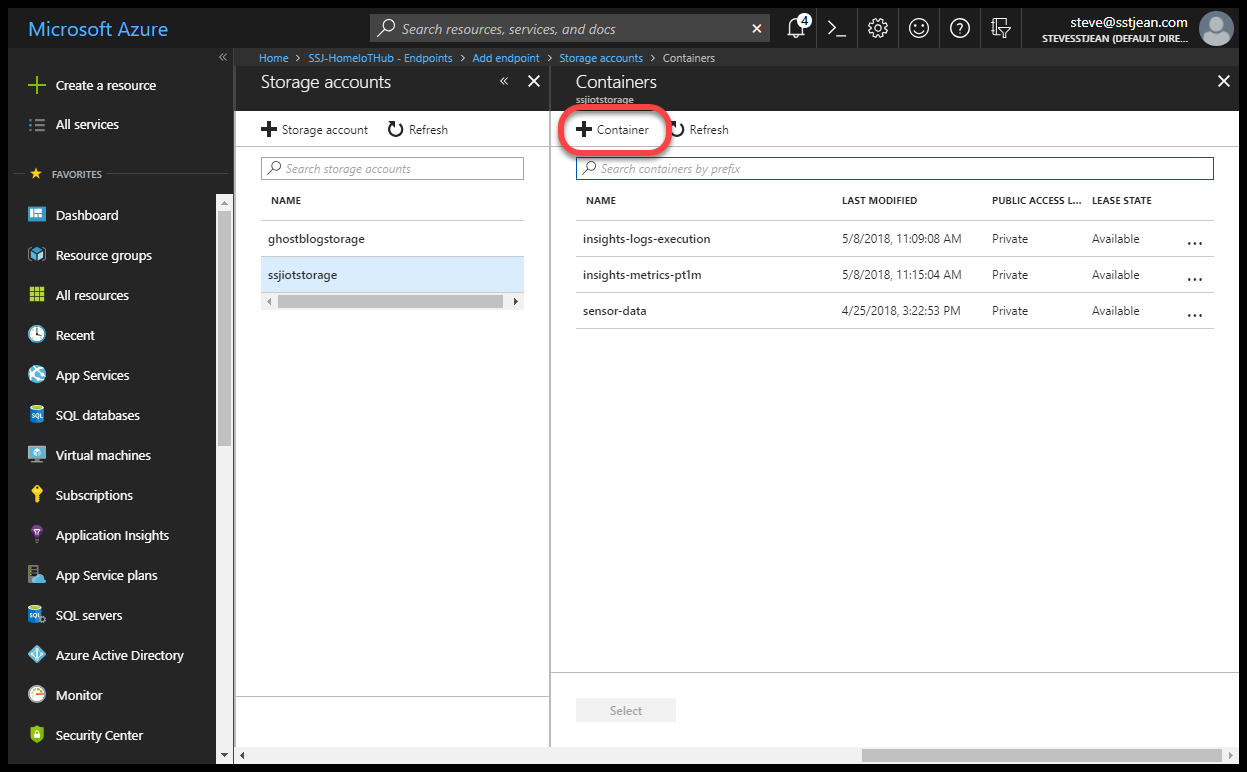
In the Storage Accounts list, select the storage account you created earlier. This will show the Storage account > Containers blade.
-
In the Containers blade click on the + Container button.
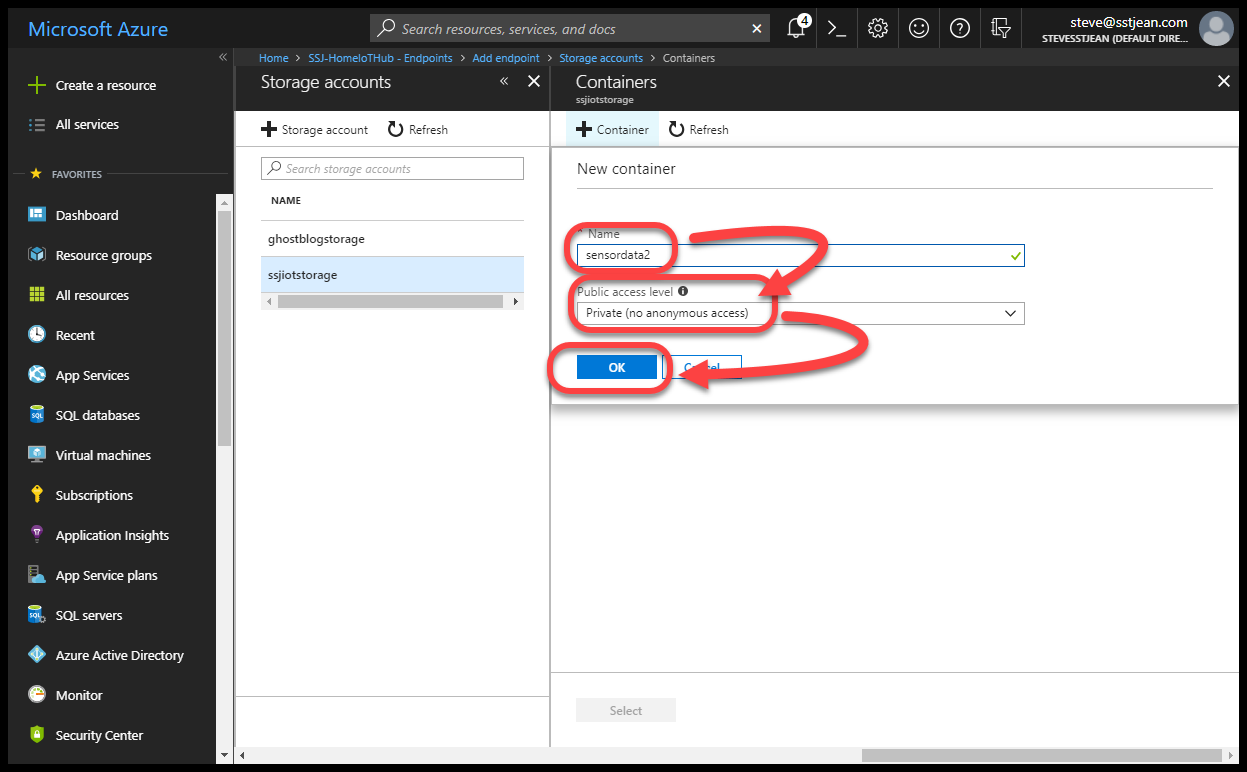
-
In the New container dialog enter the name of your storage account container. Leave its Public access level set to Private. Click the Ok button to save the container.
-
Back in the Containers blade, select the new container and click the Select button.

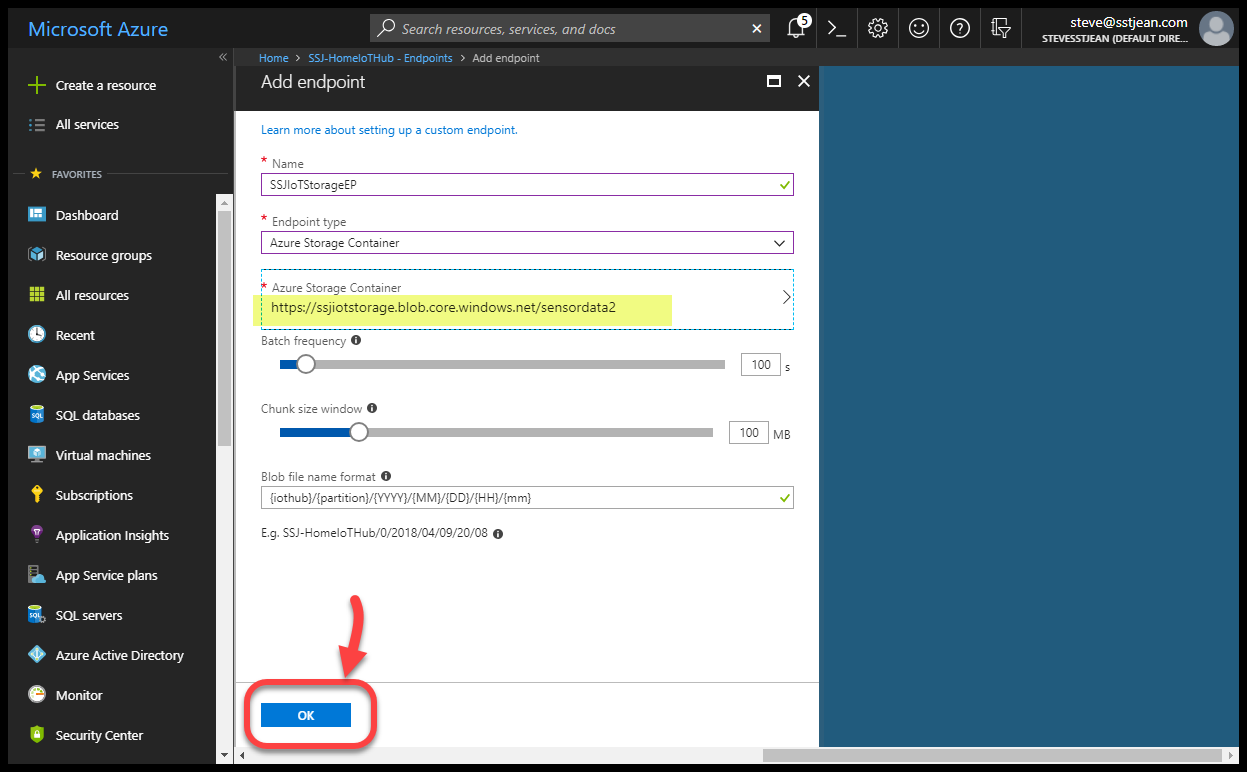
-
Back in the Add endpoint blade, note that the Azure Storage Container field is now filled. Click on the OK button to add the endpoint to your IoT Hub.
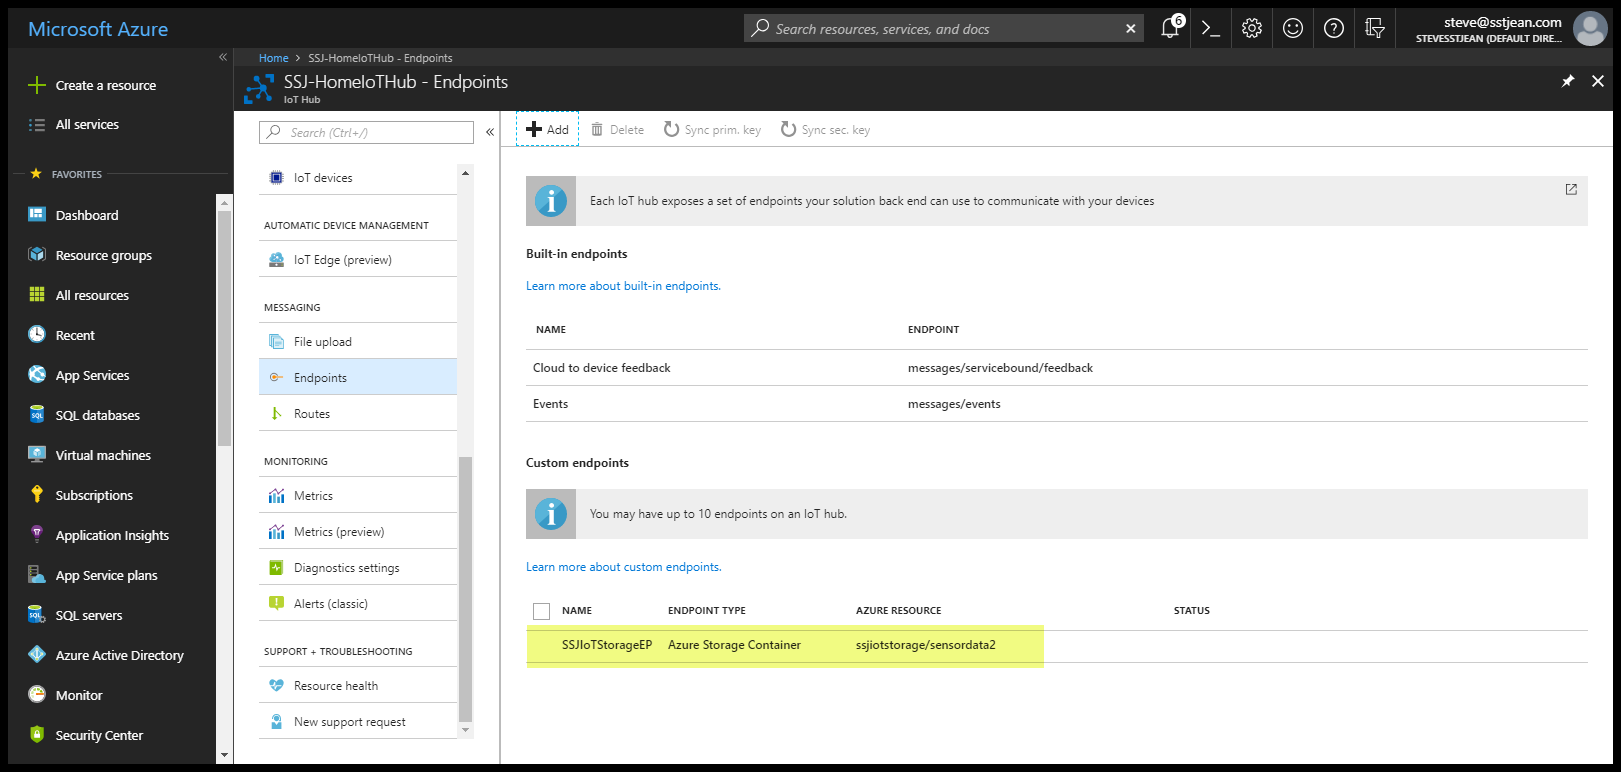
-
Back in your IoT Hub's Endpoints blade, you should now see the newly created endpoint.
Route the messages into the storage account endpoint
We are going to create a routing rule that sends all of the sensor messages to our storage account.
-
Open the Azure Portal and navigate to your IoT Hub.
-
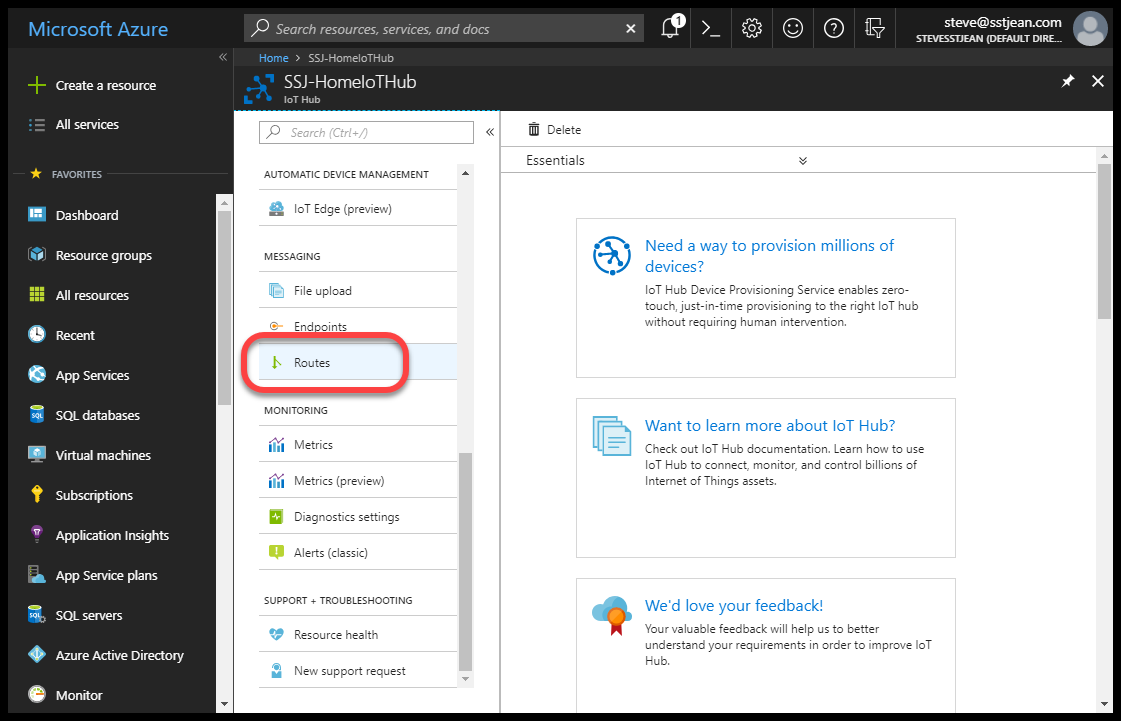
Scroll down to the Messaging section and click on Routes
-
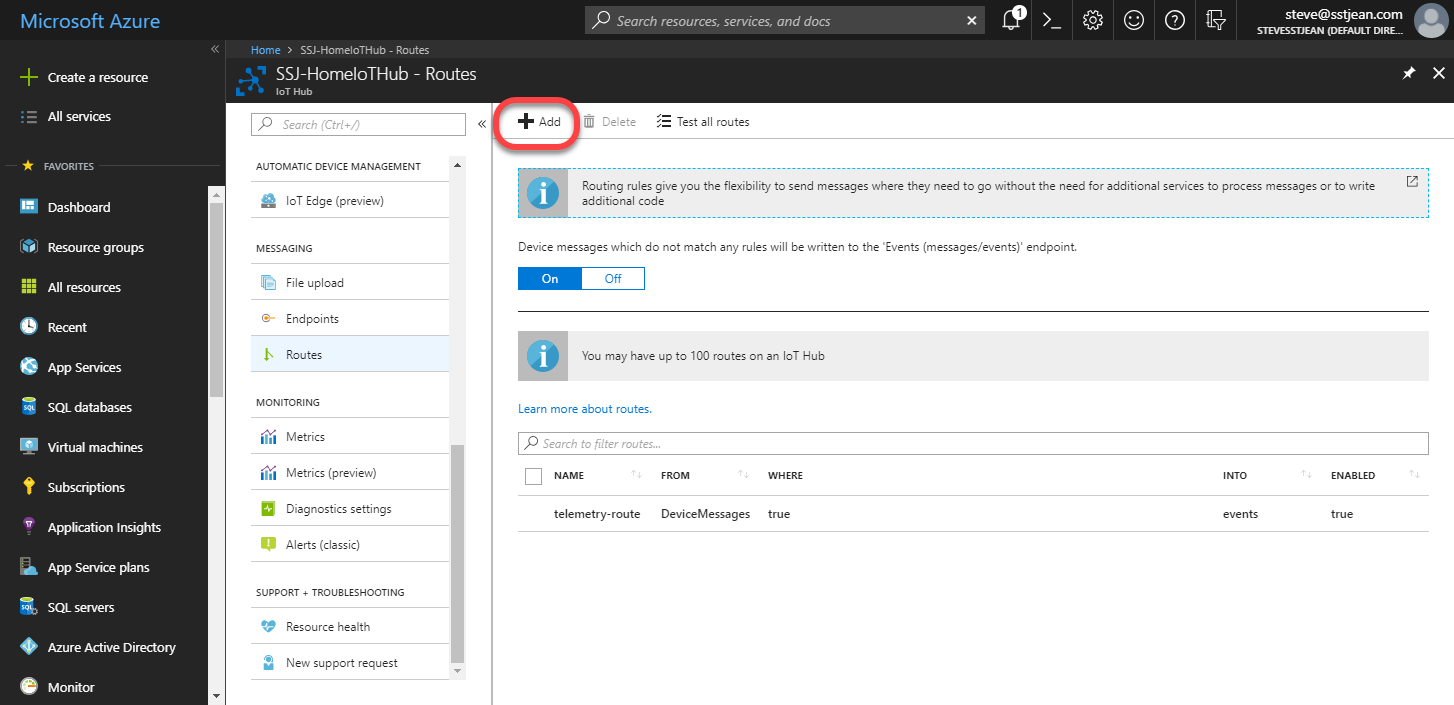
In the Routes blade click the + Add button.
-
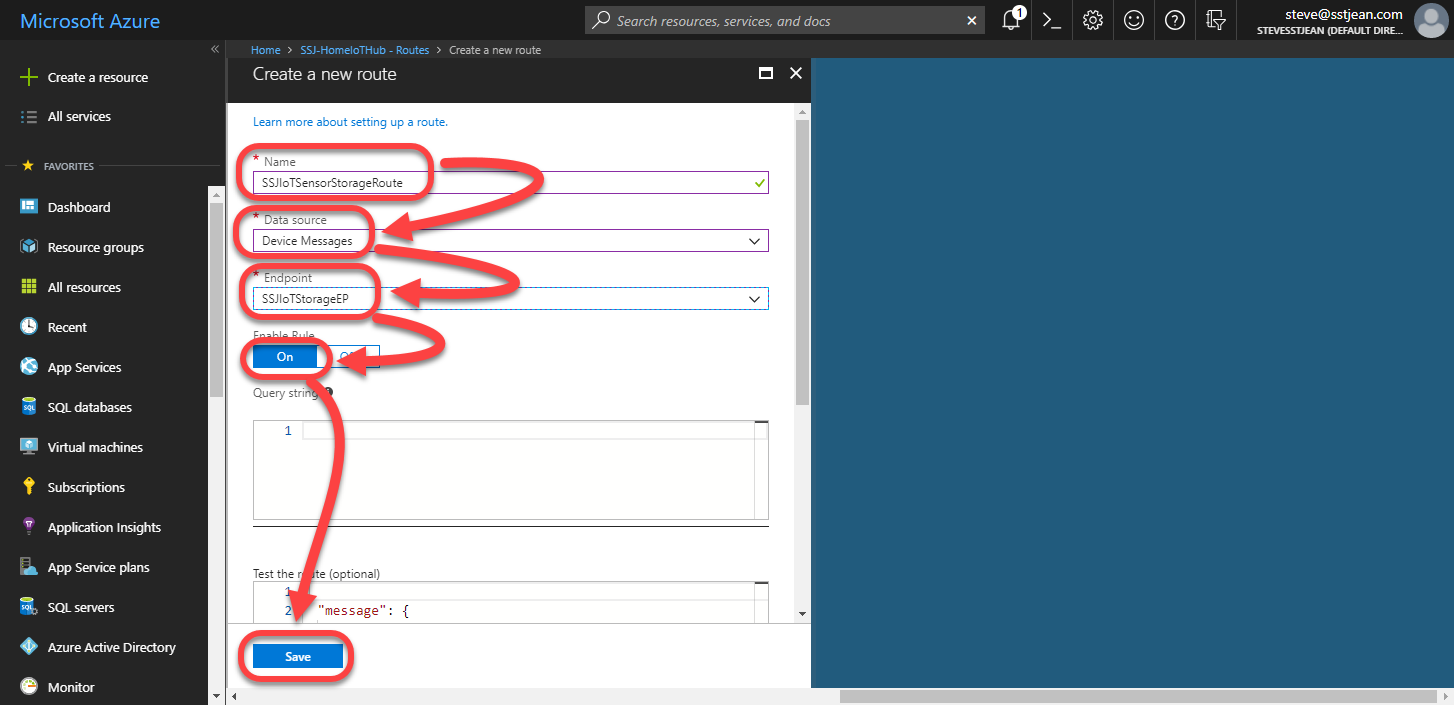
In the Create new route blade, enter a name for your rule, select Device Messages in the Data Source field, select the storage account endpoint we just created in the Endpoint field, and make sure Enable Rule is set to On. Click the Save button to save your changes.
-
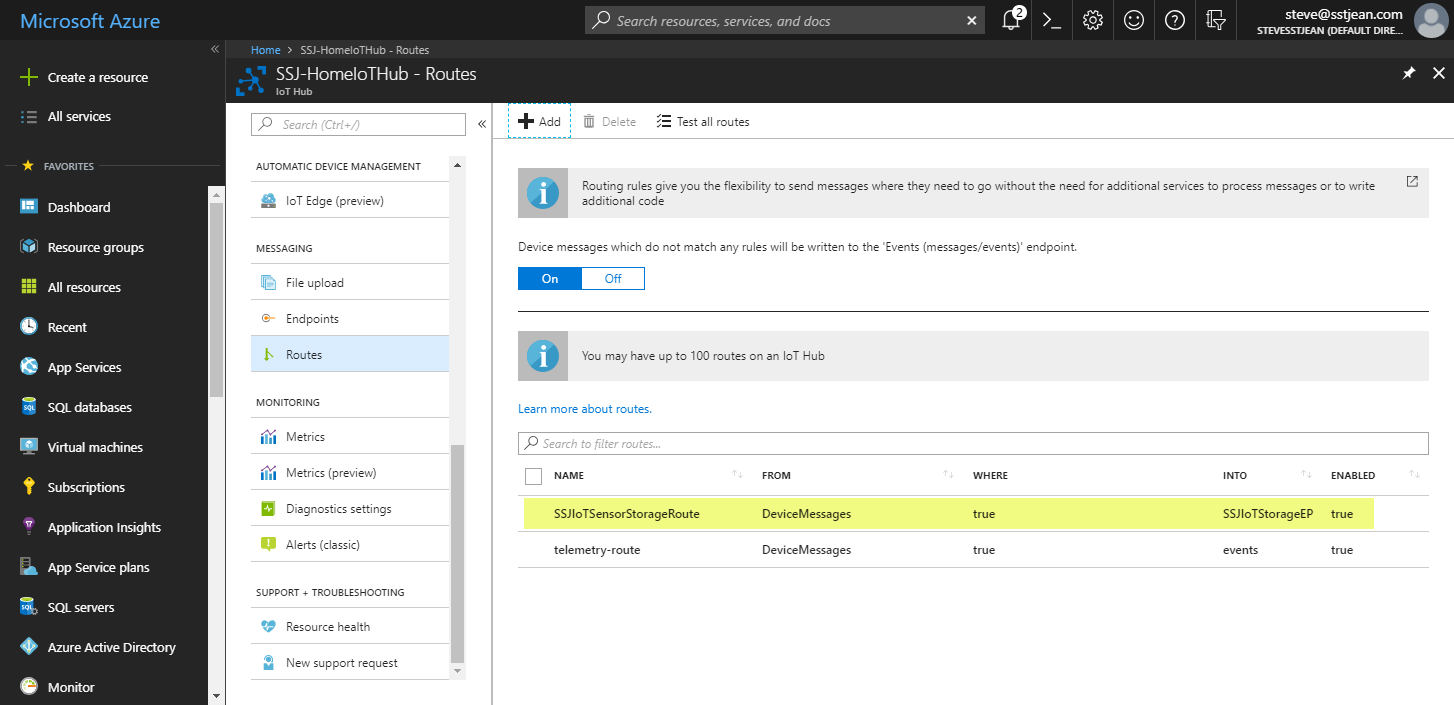
Back in the Routes blade you should now see your new Route directed at your new Endpoint.
Determine if the Route is working
One of the easiest ways to determine if your route is working is to use Azure Storage Explorer to look at the contents of the Storage Account behind your endpoint. After connecting Storage Explorer to your Azure account, navigate to the storage account you used earlier. You should see a storage container named for your IoT Hub instance.
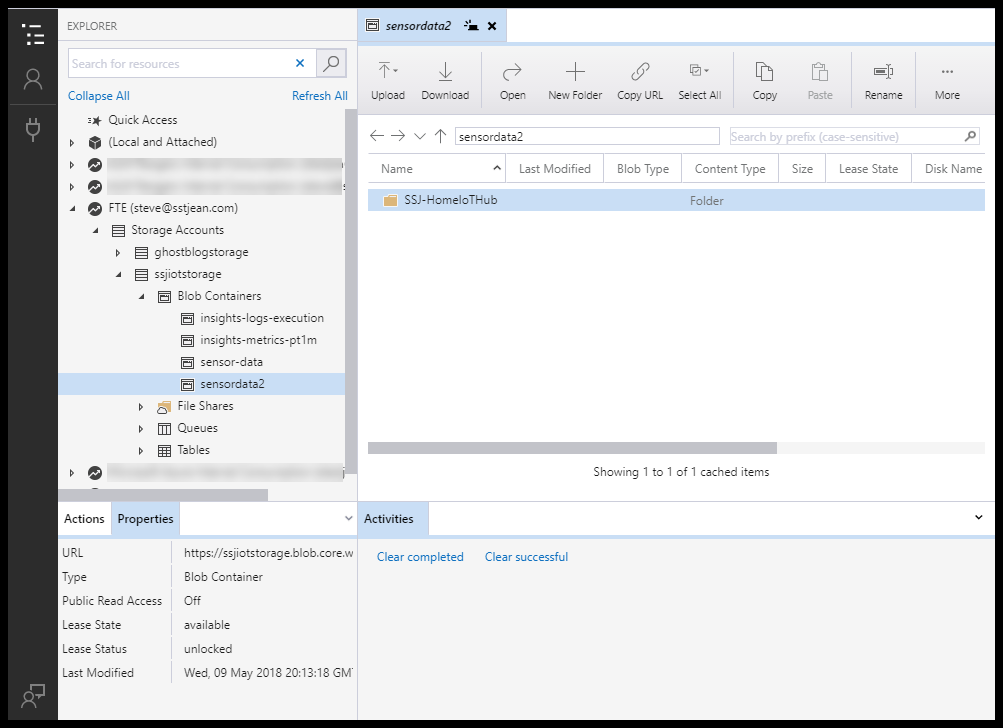
If you drill down into the storage container you will eventually get to a blob with your data.
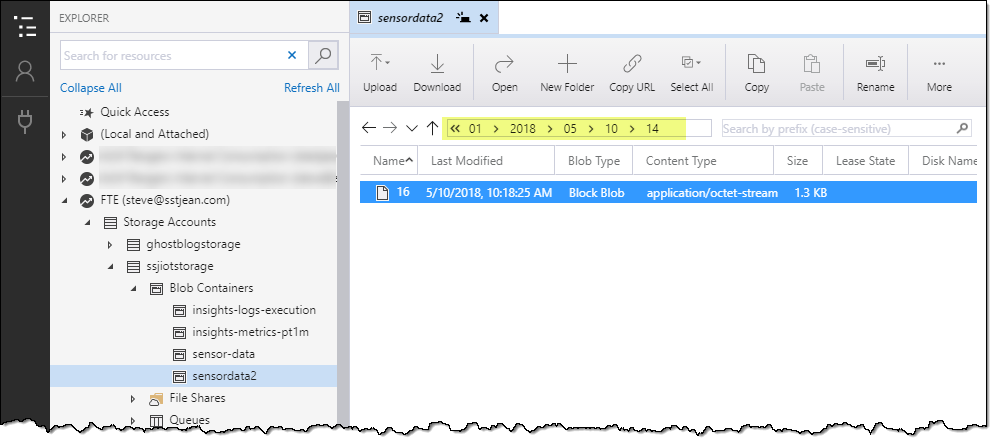
Opening that blob shows the message that your sensor rigs sent to Azure IoT Hub during the minute shown in the blob's path.
Conclusion (for now)
Now that we have the IoT Sensor rigs sending telemetry data up to Azure IoT Hub, and have that data squirreled away for later use, we can proceed toward getting the data to show up in Power BI. To do that we need to use Azure Stream Analytics as our conduit.
In the next post we will setup a basic Power BI environment and configure Stream Analytics to push data into it.
Blog Series Table of Contents
Part 1 - Problem Space
Part 2 - Electronics
Part 3 - ESP8266 Code
Part 4 - Azure IoT Hub <-- This post
Part 5 - Azure Stream Analytics
Part 6 - Power BI
Part 7 - Drawing Conclusions


Comments